I wanted to be an interior decorator when i was little. My parents (being the lovely people that they are) didn’t discourage me. They let me paint my room all sorts of atrocious colors. I’m not kidding. My room at my mom’s house once had one wall orange, one yellow, one blue and one green. Like NEON green.
As I got older, some of my choices improved from a design perspective- my mom still has a wall in her living room that I painted sometime in middle school.
As I’ve had bedrooms, dorm rooms, camps and apartments, I’ve grown even more into my style, but haven’t truly given in to my wishes to design until my current apartment. In the past, I couldn’t justify buying specific items for a place I knew I’d live in for a year or less.
Luckily, I live with two roommates who did nothing to the apartment in the last year. The girl who moved out of my apartment had most of the common room furniture, so the apartment was mine to recreate.
But most people my age don’t have the same problem I do when it comes to apartments. Other people have to find ways to fit lots into small spaces, but I have to figure out how to make things bigger, especially on the walls because I have such high ceilings. The curtains in my room are full length ones pinned up because they are so largely and awkwardly sized. Standing on a chair, I can’t kill a bug on my ceiling; I have to stand on a dresser or desk. Once I even got so annoyed i threw a shoe at my ceiling and now I have a shoe mark… that I can’t clean off.. because I can’t reach it.
So I’ve had to get really creative finding ways to cover the walls without making them all look the same and if I’m lucky, creating a few DIY projects along the way.
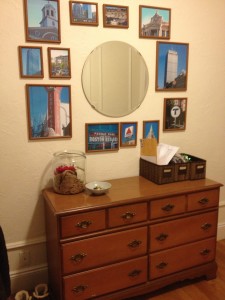
My entryway has this collage of Boston pictures that I look around the city one beautiful BLUE day. The frames are super super cheap wooden ones from AC Moore which were painted brown (because they used to be pink, orange and yellow in a previous room at my parents’).
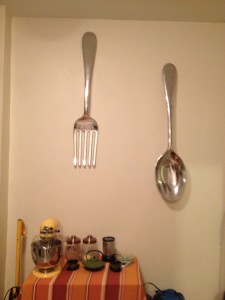
My kitchen has my dear friends Big Spoon and Big Fork from Pier1. Probably my favorite addition to the apartment and definitely the most complicated to put up. I’m already worried about taking them down when I eventually move out.
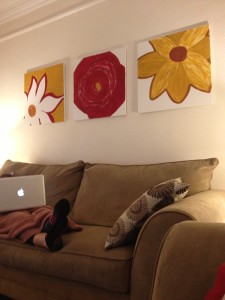
Above my couch has a few acrylic on canvas pictures that I made soon after I got the couches. While I’m not crazy about how they turned out, they get the job done.
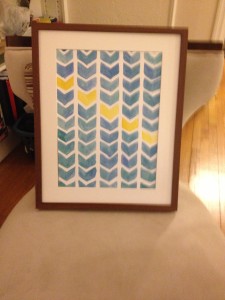
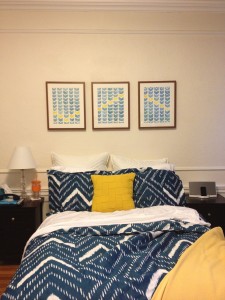
So while all of this came together fairly quickly, it took me until last week to decide what to do over my bed. I decided to go back to my college roots and back to my watercolors class. I searched around on Pinterest until I found something I sort of liked, and went from there.
I contemplated putting a quote over the watercolors part- but I think I’m going to keep it this way, nice and simple.
Needed:
- Watercolors paper
- Watercolors
- Small brush
- Cup of water and paper towel
- Ruler
- Pencil
- 3 Frames (found at ikea)
- Hooks and nails to hang
1- After deciding on a design, the first step is to pencil it out on the first sheet of paper. If you’re not a watercolors person yet- know that some watercolors pads come sort of in a block, attached on either all four or just two sides. I prefer using this kind of paper because when you put water on it, paper will bend and fold. Making sure it’s connected on some sides makes it easier to work with.
Penciling it out really was the longest step. I started with the columns to make sure they were all even, then drew a line down the center of each column to know where the bottom of each triangle should come. Then I drew one column full of shapes- more eyeballing it than measuring it out being perfect. After that, I marked each of the columns horizontally so that each shape would match the one to its left and right. After drawing it out, I tried to erase some of the lines I had created so that they wouldn’t be too obvious after painting.
2- Next, decide how you want your accent line to be and paint that first (mostly so you don’t forget about it).
3- Paint the rest of the shapes on that sheet.
4- Take that sheet off the block, and get started on the next one. I found the easiest solution was to mark around the new piece of paper any lines I could to make each of the pieces of art as similar as possible. After drawing this part out- it’s time to repeat the painting of the accent line and the painting of the rest of the shapes.
5- Do the WHOLE thing once more.
6- Frame it, hang it and make sure its level!
How do you think it turned out?
Love it!! Looks great.
Comments are closed.