So my sister moved earlier this summer to a new apartment, and had to downsize a little for her new studio. With this, instead of eating in the living room, she found herself sometimes eating in bed, because, well the living room and the bedroom are the same room.
She said she was thinking about buying a breakfast tray or something similar to make this easier and more cute.
Lightbulbbbbbbbbbb.
I decided to make her one!
So on a recent ziptrip to see the parents, I made a stop at Michael’s and found the tools to make a beautiful mosaic tray.
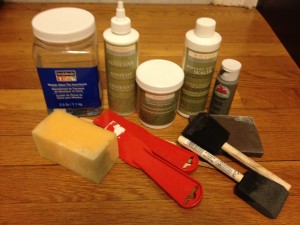
What you need:
- Plain unpainted wooden tray
- Acrylic paint
- 2 foam brushes
- Adhesive
- Grout
- Grout kit- included 2 scraper things, sponge and popsicle sticks
- Sealant
- Mosaic Tile pieces
Instructions:
– Sand down the wooden tray if there are any rough patches to make it easier to paint and to not give splinters to the user. That is not a gift worth giving.
– Give the wooden tray lots of paint love- enough coats til you feel comfortable with the color. I’d recommend giving the bottom at least one coat of paint (the part under where you’ll put the tiles) just in case some of them are see-through. Don’t want to be able to point out your paint line!
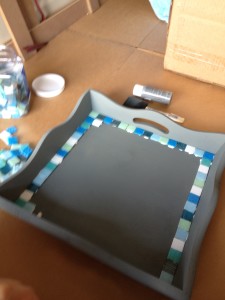
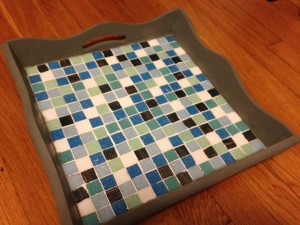
– Attach each tile, one by one. I did mine in a random pattern, but if you want to do a pattern, I’d recommend creating a piece of cardboard to size and laying them out. With this, you for some reason need to put the adhesive on both the mosaic and on the wooden tray, so I had little dots of adhesive everywhere. The tiles need to sit for 5-6 hours before anything else happens.
– Now is time for the grout. So I bought a premixed grout, and just started slobbing it on in little spoonfuls with the scraper thing. There may be a rhyme or reason to doing this the right way, but I just worked little by little smoothing the grout over the small openings until they were filled. A little time consuming, and not as fun as laying the tiles, but worth the effort.
– Wait 25 minutes then use the damp sponge to wipe off the grout that was left behind on the tiles that you don’t want to hang out forever. Wait 24 hours before the next step.
– Use the foam brush to paint the sealer over in a thin layer. While I wasn’t sure that this was necessary, as it claims it doesn’t completely waterproof it, just helps to repel water, I do think it was worth it for the element of shine. It looks like I could have gotten it from Pier 1.
The only con in this whole process: the materials to complete it weren’t cheap. I might have to make a few other mosaic projects to use up the adhesive, grout and sealant to make the project worth it. If you’re pinching pennies- you might be better off going to the Pier1 clearance section.
Also, be sure to complete this project in a well-ventilated area!
How’d I do?


looks great!! 🙂
Mito, this is so impressive! It looks beautiful, and it’s such a sweet gift for your sister. I think I see some mosaic-ing in my near future 🙂
Super cute! I hope your sister loves it!
Such a good job! I think someone has a b-day in October. Hmmmmm
I do love it!!! Way better than the clearance section!
Comments are closed.